天乙社区后台管理分析(一)
今天来讲一下后台管理的实现。主要是界面。
首先来看一下跳转到后台管理界面的过程,最开始是在社区首页的右上角点击“管理”选项,这会发出userShow请求,跳转到userShow.jsp,在该界面中再点击右上角的“后台管理”选项,会发出adminMain请求,跳转到adminMain.jsp即后台管理的首页。
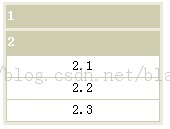
adminMain.jsp中主要就是一个frameset,其中左边放adminLeft.jsp,右边放adminIndex.jsp。先来看adminLeft.jsp。为了能更清楚地看到后台管理中的侧边栏是如何实现的,我做了如下的小实验,代码如下:
<!DOCTYPE HTML PUBLIC "-//W3C//DTD HTML 4.01 Transitional//EN" "http://www.w3.org/TR/html4/loose.dtd"><html> <head> <title> 后台管理界面小实验 </title> <script type="text/javascript" src="prototype.js"></script> </head> <body> <style type="text/css">.table2 { background-color:#ffffff }.table3 { background-color:#ebeadd }.table4 { background-color:#cfcdaf }.item { font-size:14px; color:#000000; background-color:#ffffff; }.title { font-size:14px; font-weight:bold; color:#ffffff; cursor:hand; cursor:pointer; } </style> <script language="javascript" type="text/javascript">function showMemu(i) { Element.toggle("t" + i);}function over(tid){tid.style.backgroundColor="#ebeadd";}function out(tid){tid.style.backgroundColor="#ffffff";} </script><!-- <table width="160" border="0" cellspacing="2" cellpadding="0" class="table2"> <tr> <td> --><table width="160" border="0" cellspacing="3" cellpadding="0" class="table3"><tr><td><table width="100%" border="0" cellspacing="1" cellpadding="0" class="table4"><tr><td class="title" height="21">1</td></tr></table></td></tr><tr><td><table width="100%" border="0" cellspacing="1" cellpadding="0" class="table4"><tr><td class="title" height="21" onClick="showMemu(1)">2</td><tr></table><table width="100%" border="0" cellspacing="1" cellpadding="0" style="display:none" id="t1" class="table4"><tr><td class="item" height="21" align="center" onMouseOver="over(this);" onMouseOut="out(this)">2.1</td></tr><tr><td class="item" height="21" align="center" onMouseOver="over(this);" onMouseOut="out(this)">2.2</td></tr><tr><td class="item" height="21" align="center" onMouseOver="over(this);" onMouseOut="out(this)">2.3</td></tr></table></td></tr></table><!-- </td> </tr> <table> --> </body></html>
