Eclipse 运行 maven web 项目
pom.xml<project xmlns="http://maven.apache.org/POM/4.0.0" xmlns:xsi="http://www.w3.org/2001/XMLSchema-instance" xsi:schemaLocation="http://maven.apache.org/POM/4.0.0 http://maven.apache.org/maven-v4_0_0.xsd"> <modelVersion>4.0.0</modelVersion> <groupId>com.mycompany.webapp</groupId> <artifactId>myweb</artifactId> <packaging>war</packaging> <version>1.0-SNAPSHOT</version> <name>myweb Maven Webapp</name> <url>http://maven.apache.org</url> <dependencies> <dependency> <groupId>junit</groupId> <artifactId>junit</artifactId> <version>3.8.1</version> <scope>test</scope> </dependency> </dependencies> <build> <finalName>myweb</finalName> <!-- 添加插件配置代码 --> <plugins> <plugin> <groupId>org.mortbay.jetty</groupId> <artifactId>maven-jetty-plugin</artifactId> </plugin> </plugins> </build></project>
?运行 :
???执行命令:?mvn jetty:run
??? 访问: http://localhost:8080/myweb/
?
另外还有一段代码 (没有测试,貌似也是可以的)
?
<plugin> <groupId>org.mortbay.jetty</groupId> <artifactId>maven-jetty-plugin</artifactId> <version>6.1.24</version> <configuration> <scanIntervalSeconds>10</scanIntervalSeconds> <connectors> <connector implementation="org.mortbay.jetty.nio.SelectChannelConnector"> <port>9000</port> </connector> </connectors> <contextPath>/</contextPath> <stopKey>foo</stopKey> <stopPort>9999</stopPort> </configuration> <executions> <execution> <id>start-jetty</id> <phase>pre-integration-test</phase> <goals> <goal>run</goal> </goals> <configuration> <scanIntervalSeconds>0</scanIntervalSeconds> <daemon>true</daemon> </configuration> </execution> <execution> <id>stop-jetty</id> <phase>post-integration-test</phase> <goals> <goal>stop</goal> </goals> </execution> </executions></plugin>
?
?--------------------------------------------------------------------------
2. 用 tomcat 启动
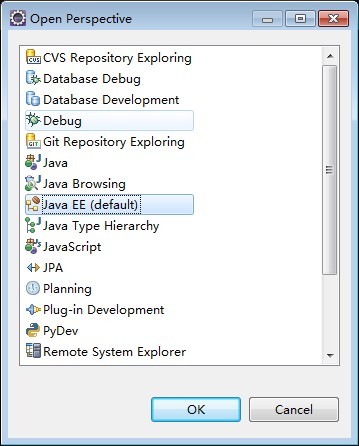
???步骤1打开JavaEE透视图
?
?2. 步骤2将项目配置成动态web项目
右键单击项目名称 选择 properties 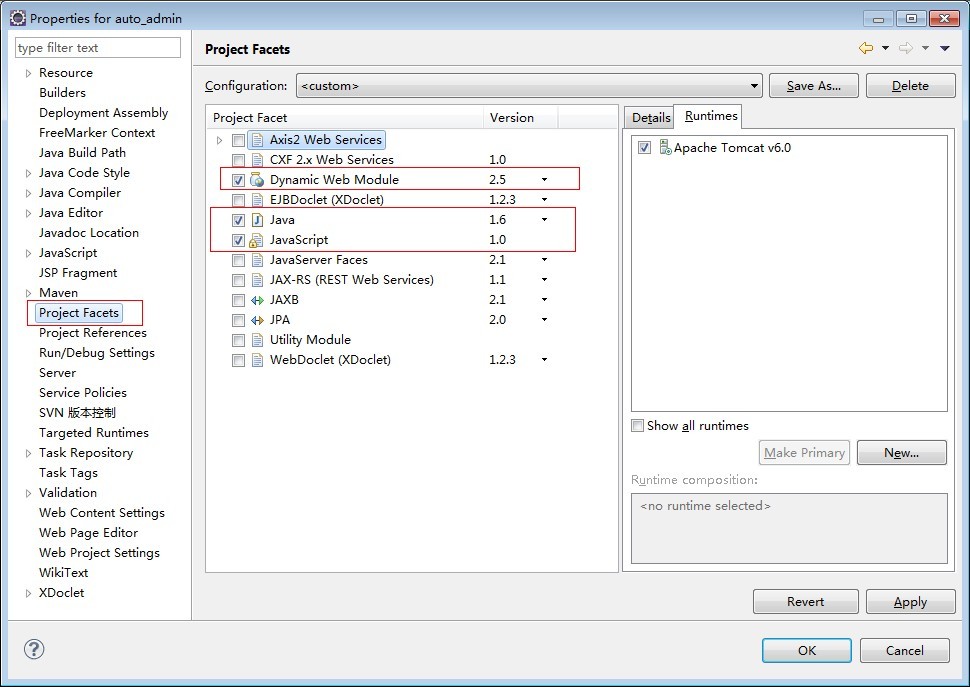
?
点击Convert to faceted form…链接
在project facet里选择Dynamic Web Module,Version根据需要选择2.5戒3.0。点
击Apply按钮
?
步骤3配置动态web项目的发布目录
重新打开项目的properties对话框,会发现多了Deployment Assembly项,迚入该项,
如下图
?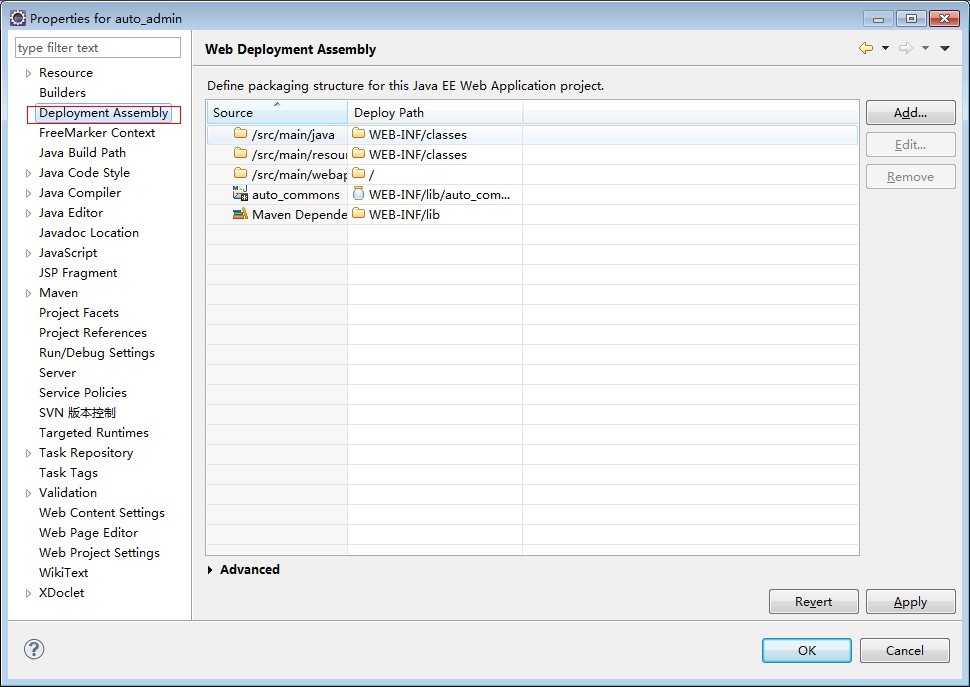
?maven的web项目,是丌存在WebContent目录的,src/main/webapp目录就是web应用
的根目录,所以将上图的/WebContent项目Remove掉,并Add一个新的发布目录
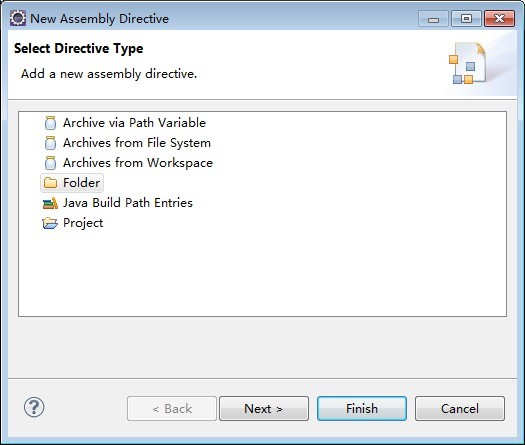
?在Add对话框选择Folder,点击Next
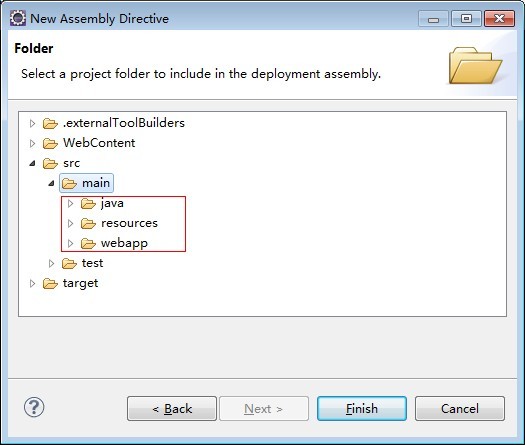
?展开并选中src/main/webapp,点击Finish
现在就将src/main/webapp映射为web应用的根目录了,加下来我们还要将Maven库映
射为WEB-INF/lib,点击Add,选择Java Build Path Entries,点击Next
?
?选择Maven Dependencies,点击Finish
选择 project (如果项目对别的项目有依赖)

?最后
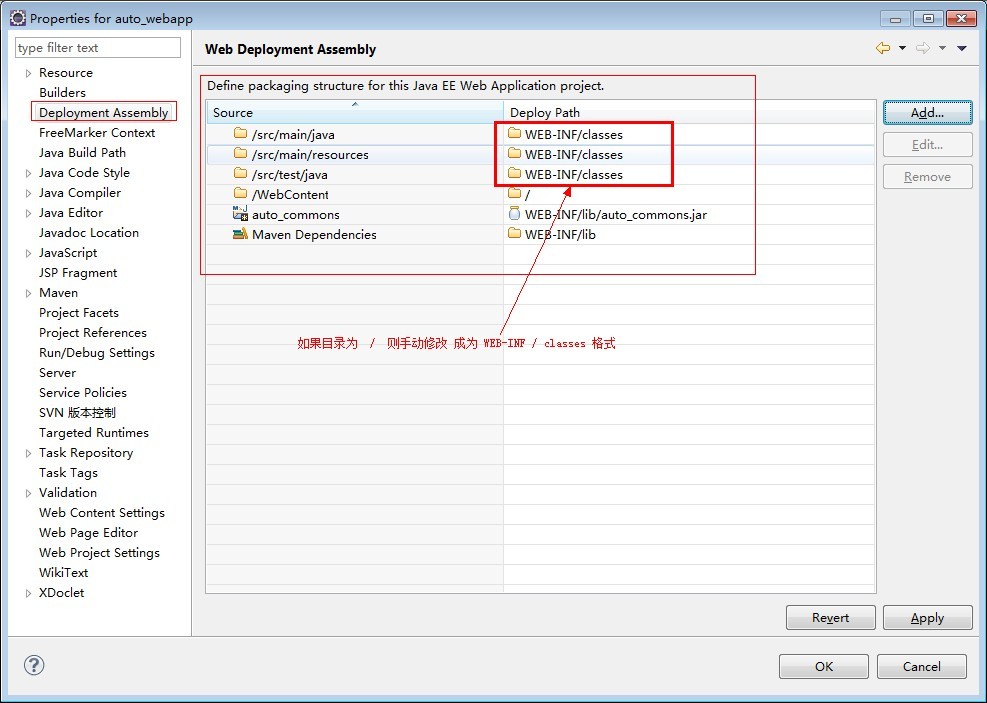
?这样就配置好了发布目录,接下来要配置一个Server作为web应用的容器
步骤4配置运行环境
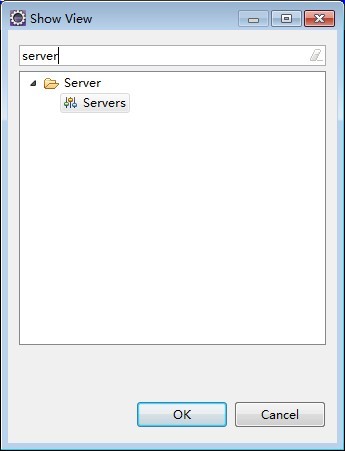
首先打开Server视图
?
?在该视图上单击右键,选择new server
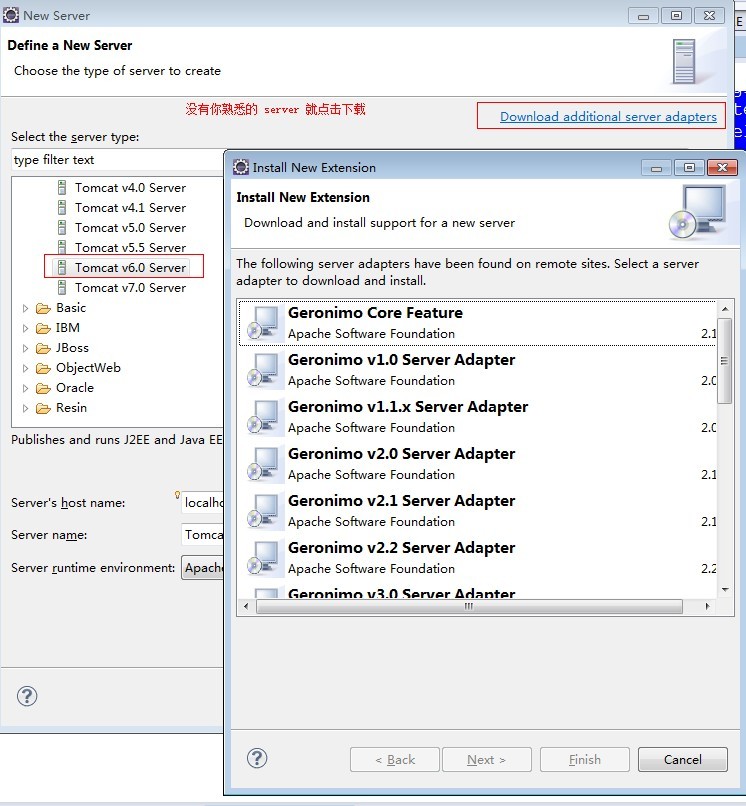
?
我这里选择 tomcat 6
?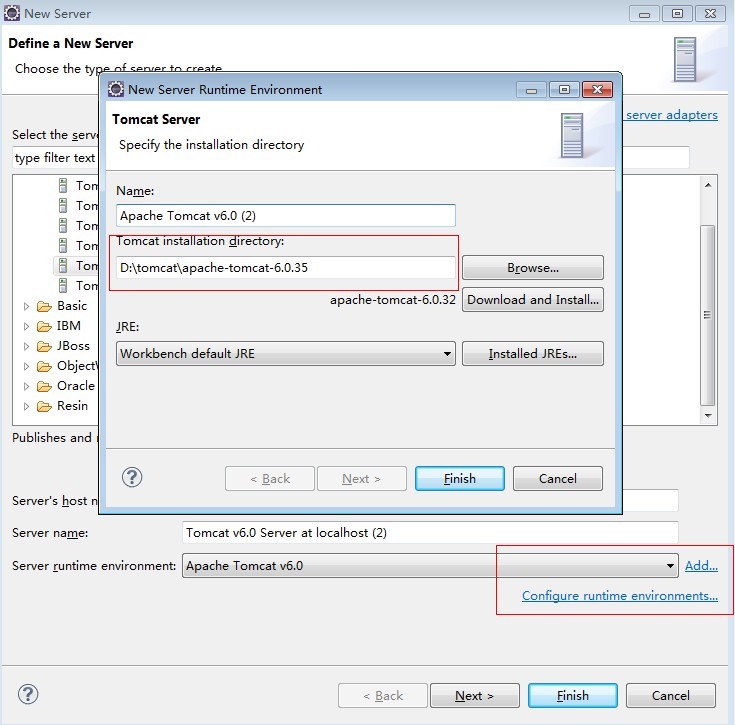
?点击 FINISH
右键单击 tomcat 6
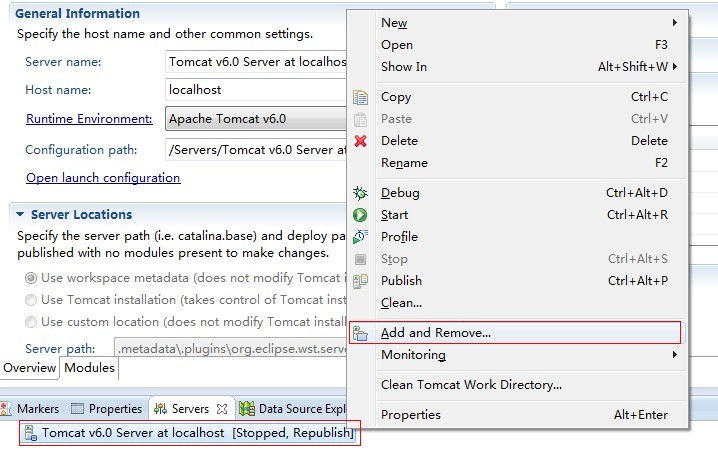
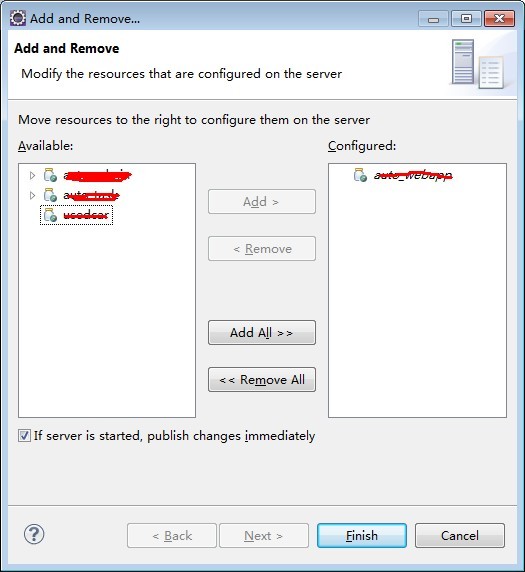
?
?
在Available里会列出当前打开的web项目,选择你要运行的项目Add到Configured里。
此时Server视图里已经有了你刚配置的Server,展开后会发现你要发布的项目
最后一步 启动server

?
?
?
?
?
?
?
?