一种简单的web service服务安全策略
继上两篇(jdk6下开发webservice示例,利用soapui和jdk API访问webservice)关于如何创建并调用web service的博客后,我一直还想写点关于web service相关的内容,一直忙其他的事,拖到今天,终于要想写一点。
对于web service,通过前面两篇博客,我们已经能够很方便的创建一个web service,并调用它,对于初学web service技术的同学来说,是个良好的开端。但是,很快大家会提出一个问题:这样的web service如何保证它的安全性呢?今天我就向大家介绍一种比较简单的方式。
1、这种ws的原理示意图
为了让大家清楚的了解篇文章想要讲述的WS安全原理,我粗略的画了一个图。后面叙述我会结合该图进行讲述。
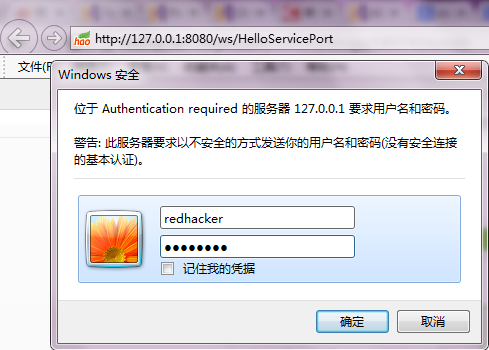
2、让我们先看看Tomcat2中App1的WS要如何通过容器认证保护起来
在web.xml里,我们加入如下代码,对ws进行保护:
<security-role> <description>role for acess the WS api</description> <role-name>WSAdmin</role-name> </security-role> <security-constraint> <web-resource-collection> <web-resource-name>web service api</web-resource-name> <url-pattern>/ws/*</url-pattern> </web-resource-collection> <auth-constraint> <role-name>WSAdmin</role-name> </auth-constraint> <user-data-constraint> <transport-guarantee>NONE</transport-guarantee> </user-data-constraint> </security-constraint> <login-config> <auth-method>BASIC</auth-method> </login-config>
<tomcat-users><role rolename="WSAdmin"/><user username="redhacker" password="11111111" roles="WSAdmin"/></tomcat-users>


public class HelloServiceTest {// 调用WSpublic static String testHelloService(String name) throws Exception,IOException { Authenticator.setDefault(new Authenticator() { protected PasswordAuthentication getPasswordAuthentication() { return new PasswordAuthentication("redhacker", "11111111".toCharArray()); } });// 构建请求报文StringBuffer sendMsgBuffer = new StringBuffer("<soapenv:Envelope xmlns:soapenv="http://schemas.xmlsoap.org/soap/envelope/" xmlns:jav="http://www.javaedu.com">");sendMsgBuffer.append("<soapenv:Header/>").append("<soapenv:Body>").append("<jav:hello>").append("<arg0>").append(name).append("</arg0>").append("</jav:hello>").append("</soapenv:Body>").append("</soapenv:Envelope>");String sendMsg = sendMsgBuffer.toString();// 开启HTTP连接?URL url = new URL(Util.HELLO_WS_URL);HttpURLConnection httpConn = (HttpURLConnection) url.openConnection();// 设置HTTP请求相关信息httpConn.setRequestProperty("Content-Length",String.valueOf(sendMsg.getBytes().length));httpConn.setRequestProperty("Content-Type", "text/xml; charset=utf-8");httpConn.setRequestMethod("POST");httpConn.setDoOutput(true);httpConn.setDoInput(true);// 进行HTTP请求OutputStream outObject = httpConn.getOutputStream();outObject.write(sendMsg.getBytes());// 关闭输出流outObject.close();// 获取HTTP响应数据InputStreamReader isr = new InputStreamReader(httpConn.getInputStream(), "utf-8");BufferedReader inReader = new BufferedReader(isr);StringBuffer result = new StringBuffer();String inputLine;while ((inputLine = inReader.readLine()) != null) {result.append(inputLine);}// 打印HTTP响应数据System.out.println(result);// 关闭输入流inReader.close();isr.close();return result.toString();} Authenticator.setDefault(new Authenticator() { protected PasswordAuthentication getPasswordAuthentication() { return new PasswordAuthentication("redhacker", "11111111".toCharArray()); } });<?xml version="1.0" ?><S:Envelope xmlns:S="http://schemas.xmlsoap.org/soap/envelope/"><S:Body><ns2:helloResponse xmlns:ns2="http://www.javaedu.com"><return>Hello,jack</return></ns2:helloResponse></S:Body></S:Envelope>
Exception in thread "main" java.io.IOException: Server returned HTTP response code: 401 for URL: http://127.0.0.1:8080/ws/HelloServicePort?wsdlat sun.net.www.protocol.http.HttpURLConnection.getInputStream(HttpURLConnection.java:1436)at com.je.ws.client.HelloServiceTest.testHelloService(HelloServiceTest.java:56)at com.je.ws.client.HelloServiceTest.main(HelloServiceTest.java:75)