首页 诗词 字典 板报 句子 名言 友答 励志 学校 网站地图
当前位置: 首页 > 教程频道 > 网站开发 > Web前端 >

JavaFX Demo学习1-Clock

2012-11-22 
JavaFX Demo学习1-----Clock第一个附件是使用JavaFX编写一个Clock的教程,很详细。运行结果如下。学习一门语

JavaFX Demo学习1-----Clock
第一个附件是使用JavaFX编写一个Clock的教程,很详细。运行结果如下。
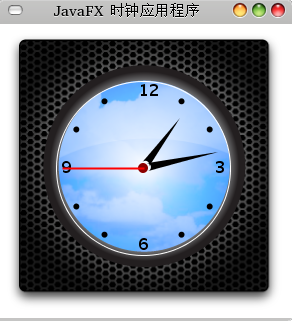


学习一门语言最好的方法就是看例子+多动手。所以先从它的Demo开始学习。这个Demo还是比较简单的。总共就一百多行。但是效果却不凡
从Frame开始看吧!但码如下:

Frame {    title:"JavaFX 时钟应用程序"    width:295    height: 325    closeAction:function() {         java.lang.System.exit( 0 );     }     visible:true    stage:Stage {         content: Clock{}  } }

很简单吧!即使以前从来没看过JavaFX,只要你学过j2se里的awt或swing,即使是皮毛,也基本能看懂。
从这段代码能看出如下几点:
1.javaFX一般是不需要分号来标记结尾的。这应该算是现在脚本语言的一种特色了。(说到一般,当然就有特殊了,上面代码里就有一处用了分号)
2.给属性赋值不是=,而是:。title,width,height....
3.closeAction看名字应该不是普通属性,再看后面给它赋的是个function,而这个function很明显是用来关闭程序用的。应该就是与swing里面的监听器类似的东西了。
4.javafx实例话不需要使用new关键字,看content:Clock{},Clock是类,要实例化,只要后面加个{}即可。
整个代码里面最重要的地方应该也是很明显的,stage属性。请出api来吧。看看它的用法。
stageStage

This is the stage that the window presents on screen for showing content.
这是用来显示用的。它接受的参数类型是Stage,再看Stage.
contentNode[]

The array of Nodes to be rendered on this Stage.
Stage里面的content接受Node类型的数组,并且将这些Node显示出来。
再看我们的代码,content接受的是Clock{}这个实例,而它要接受的是Node类型,所以可以猜想出来了,Clock肯定是Node的子类。

所以呢,Clock就继承了CustomNode类。继续看api,不过这里建议是ctrl+鼠标左键,点进去看源码,感觉那里更清晰一点。
public abstract class CustomNode extends Node {

这是一个抽象类,并且继承了Node,而上面有一段说明和一个例子。
/** * Define your own node classes by extending this class and  * implementing its create method. Example: @exampleimport javafx.scene.*;import javafx.scene.paint.*;import javafx.scene.geometry.*;public class Bars extends CustomNode {    public function create():Node {        return Group {            content: for(x in [0..4]) {                Rectangle {                    y: indexof x * 20                    width: 100                     height: 10                     fill:Color.RED                }            }        }    }}Bars { }@endexample

如果你想定义自己的Node类型的类,那么就继承CustomNode并且实现它的create方法。所以Clock就这么做了 这里的create()后面跟了个:Node,是说这个方法的返回类型是Node类型。就java里面的类型拿后面就行了。
那下面看看Clock的代码
public class Clock extends CustomNode {    public attribute radius:Number = 77 ;    public attribute centerX:Number = 144 ;    public attribute centerY:Number = 144 ;        public attribute hours:Number;    public attribute minutes:Number;    public attribute seconds:Number;    public function nextTick () {         var now = new Date();        seconds = now.getSeconds();        minutes = now.getMinutes();        hours = now.getHours();    }         public function create(): Node {        return Group {            content:[                ImageView {                    image: Image {                        url: "{__DIR__}clock_background.png"                    }                },                Group{                    transform: Translate { x: centerX, y: centerY }                    content: [                        Circle {                            radius: radius + 10                    //stroke: Color.BLUE                        },                // code to display the numbers for every third hour                         for (i in [3, 6, 9, 12])                        Text {                             transform:Translate { x :-5, y : 5 }                             font:Font {size:16 style:FontStyle.BOLD }                            x:radius * (( i + 0 ) mod 2 * ( 2 - i / 3))                             y:radius * (( i + 1 ) mod 2 * ( 3 - i / 3))                             content:"{i}"                         },//code to display a circle for the rest of the hours on the clock                         for (i in [1..12])                             if (i mod 3 != 0 ) then Circle {                             transform:Rotate { angle:30 * i }                             centerX:radius                            radius: 3                             fill:Color.BLACK                        } else[ ],// code for the clock's first center circle                        Circle {                             radius:5                            fill:Color.DARKRED                        },//code for the smaller center circle                        Circle {                            radius:3                            fill:Color.DARKRED                        },//code for the seconds hand                        Line {                            transform:Rotate { angle: bind seconds * 6 }                            endY:-radius - 3                            strokeWidth: 2                            stroke:Color.RED                        },//code for the hour hand                        Path {                            transform:Rotate { angle:bind (hours + minutes / 60) * 30 - 90 }                            fill:Color.BLACK                            elements: [                                MoveTo {x:4, y: 4},                                ArcTo {x:4 y:-4 radiusX:1 radiusY: 1},                                LineTo{ x:radius - 15 y: 0},                            ]                        },// code for the minutes hand                        Path {                            transform:Rotate { angle: bind minutes * 6 - 90}                            fill:Color.BLACK                            elements: [                                MoveTo {x:4, y: 4},                                ArcTo {x:4 y:-4 radiusX:1 radiusY: 1},                            LineTo{ x:radius y: 0},]                        }                    ]            }]        };    }        init{        var timeline = Timeline {            repeatCount: Timeline.INDEFINITE            keyFrames : [                KeyFrame {                    time : 1s                    action: function() {                        nextTick();                    }                }            ]        }        timeline.start();    }}

好~~~长一段。而create方法就占了一大半。那就先看create方法。
直接就return了 返回一个Group,继续请出api吧!
The Group class represents a list of Nodes objects.
Group类是用来描述(可能存放更好像)一组Node对象的。
contentNode[]
而content属性就接受Node数组了。很像Java里面的泛型集合类List<Node>,不过这里是数组。
那么仔细看下代码,余下的代码都是在[]之内的,那么可以说明,余下的代码都是一个个的Node,而[]就表示数组了,每个数组元素之间以逗号隔开。眼尖的肯定发现了,里面还有一个Group,那么Group肯定也是继承了Node了,而且返回的是一个Group,而需要的是一个Node,那就可以肯定刚才的猜想了。不信看api贝
那么开始看节点,第一个节点
ImageView {                    image: Image {                        url: "{__DIR__}clock_background.png"                    }                }

ImageView继承自Node,作用显示图片用的,image属性和content应该是类似的,不过接受Image类型,Image里面的url定位到图片上去。猜测完毕。api鉴定。。
这里的{__DIR__},我没搞清楚是什么东东,应该是代替路径的,目前猜测是代替该类所在的路径,没找到资料,有高人请指点一下。
第二个节点是Group,里面的第一个属性是transform,接受Translate类型。作用不好猜,直接看api。
transformTransform[]

Defines the array of Transform objects to be applied when this Node is shown.
transform属性定义了一组Transform对象,当Node被显示出来的时候来应用这些Transform对象。

Transform

This class provides static functions to perform rotating, scaling, shearing, and translation transformations for Affine objects.
Transform提供了一组静态的方法类为Affine对象实现旋转,刻度,修剪和转换等动作。(翻译不准。凑合。。)

那么这里的Translate肯定就试Transform的子类了。
transform: Translate { x: centerX, y: centerY }这个就是定位用的,可以改变一下centerX,centerY的值,再看看运行结果。
然后就又是一堆的Node了,基本类似,不废话了。
还有几个地方就是。
for (i in [3, 6, 9, 12]),循环,和foreach循环很类似的东西。
transform:Rotate { angle:30 * i } 旋转,旋转角度为30的倍数。
transform:Rotate { angle: bind seconds * 6 }也是旋转,不过这里用到了一个关键字,bind,现在的理解是,很像注册监听器的动作。bind了属性后,那么seconds改变后,angle属性也随之改变。不过这里的bind好像是双向的,也就是angle改变后,也会反应到seconds上去。后面再研究。

从这个程序可以看出,javaFX与swing相比,的确简化了不少,就Transform来说,旋转,移动什么的只需要一行代码,不需要那么多废话了。


fx新旧版本差别比较大,目前以fx1.0为准

热点排行