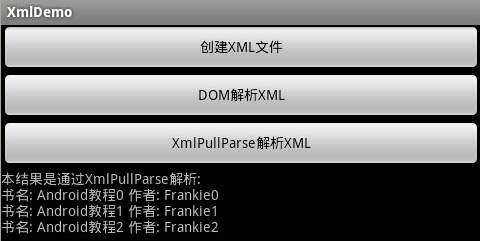
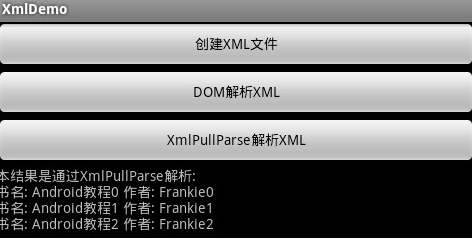
Android中创建与几种解析xml的方法!
第一步:新建一个Android工程,命名为XmlDemo.
第二步:修改main.xml布局文件,代码如下:
<?xml version="1.0" encoding="utf-8"?> <LinearLayout xmlns:android="http://schemas.android.com/apk/res/android" android:orientation="vertical" android:layout_width="fill_parent" android:layout_height="fill_parent" > <Button android:id="@+id/btn1" android:layout_width="fill_parent" android:layout_height="wrap_content" android:text="创建XML文件" /> <Button android:id="@+id/btn2" android:layout_width="fill_parent" android:layout_height="wrap_content" android:text="DOM解析XML" /> <Button android:id="@+id/btn3" android:layout_width="fill_parent" android:layout_height="wrap_content" android:text="XmlPullParse解析XML" /> <TextView android:id="@+id/result" android:layout_width="fill_parent" android:layout_height="wrap_content" /> </LinearLayout>?第三步:修改主核心程序XmlDemo.java,代码如下:
public class WriteXML extends Activity implements OnClickListener{ private static final String BOOKS_PATH = "/sdcard/books2.xml"; private Button mButton1,mButton2,mButton3; private TextView mTextView; @Override public void onCreate(Bundle savedInstanceState) { super.onCreate(savedInstanceState); setContentView(R.layout.main); setupViews(); } //初始化工作 private void setupViews(){ mTextView = (TextView)findViewById(R.id.result); mButton1 = (Button)findViewById(R.id.btn1); mButton2 = (Button)findViewById(R.id.btn2); mButton3 = (Button)findViewById(R.id.btn3); mButton1.setOnClickListener(this); mButton2.setOnClickListener(this); mButton3.setOnClickListener(this); } //创建xml文件 private void createXmlFile(){ File linceseFile = new File(BOOKS_PATH); try{ linceseFile.createNewFile(); }catch (IOException e) { Log.e("IOException", "exception in createNewFile() method"); } FileOutputStream fileos = null; try{ fileos = new FileOutputStream(linceseFile); }catch (FileNotFoundException e) { Log.e("FileNotFoundException", "can't create FileOutputStream"); } XmlSerializer serializer = Xml.newSerializer(); try { serializer.setOutput(fileos,"UTF-8"); serializer.startDocument(null, true); serializer.startTag(null, "books"); for(int i = 0; i < 3; i ++){ serializer.startTag(null, "book"); serializer.startTag(null, "bookname"); serializer.text("Android教程" + i); serializer.endTag(null, "bookname"); serializer.startTag(null, "bookauthor"); serializer.text("Frankie" + i); serializer.endTag(null, "bookauthor"); serializer.endTag(null, "book"); } serializer.endTag(null, "books"); serializer.endDocument(); serializer.flush(); fileos.close(); } catch (Exception e) { Log.e("Exception","error occurred while creating xml file"); } Toast.makeText(getApplicationContext(), "创建xml文件成功!", Toast.LENGTH_SHORT).show(); } //dom解析xml文件 private void domParseXML(){ File file = new File(BOOKS_PATH); DocumentBuilderFactory dbf = DocumentBuilderFactory.newInstance(); DocumentBuilder db = null; try { db = dbf.newDocumentBuilder(); } catch (ParserConfigurationException e) { e.printStackTrace(); } Document doc = null; try { doc = db.parse(file); } catch (SAXException e) { e.printStackTrace(); } catch (IOException e) { e.printStackTrace(); } Element root = doc.getDocumentElement(); NodeList books = root.getElementsByTagName("book"); String res = "本结果是通过dom解析:" + "\n"; for(int i = 0; i < books.getLength();i++){ Element book = (Element)books.item(i); Element bookname = (Element)book.getElementsByTagName("bookname").item(0); Element bookauthor = (Element)book.getElementsByTagName("bookauthor").item(0); res += "书名: " + bookname.getFirstChild().getNodeValue() + " " + "作者: " + bookauthor.getFirstChild().getNodeValue() + "\n"; } mTextView.setText(res); } //xmlPullParser解析xml文件 private void xmlPullParseXML(){ String res = "本结果是通过XmlPullParse解析:" + "\n"; try { XmlPullParserFactory factory = XmlPullParserFactory.newInstance(); XmlPullParser xmlPullParser = factory.newPullParser(); xmlPullParser.setInput(Thread.currentThread().getContextClassLoader() .getResourceAsStream(BOOKS_PATH), "UTF-8"); int eventType = xmlPullParser.getEventType(); try{ while (eventType != XmlPullParser.END_DOCUMENT) { String nodeName = xmlPullParser.getName(); switch (eventType) { case XmlPullParser.START_TAG: if("bookname".equals(nodeName)){ res += "书名: " + xmlPullParser.nextText() + " "; }else if("bookauthor".equals(nodeName)){ res += "作者: " + xmlPullParser.nextText() + "\n"; } break; default: break; } eventType = xmlPullParser.next(); } } catch (IOException e) { e.printStackTrace(); } } catch (XmlPullParserException e) { e.printStackTrace(); } mTextView.setText(res); } //按钮事件响应 public void onClick(View v) { if(v == mButton1){ createXmlFile(); }else if(v == mButton2){ domParseXML(); }else if(v == mButton3){ xmlPullParseXML(); } } }?第四步:由于我们在Sd卡上新建了文件,需要增加权限,如下代码(第16行):
<?xml version="1.0" encoding="utf-8"?> <manifest xmlns:android="http://schemas.android.com/apk/res/android" package="com.tutor.xml" android:versionCode="1" android:versionName="1.0"> <application android:icon="@drawable/icon" android:label="@string/app_name"> <activity android:name=".XmlDemo" android:label="@string/app_name"> <intent-filter> <action android:name="android.intent.action.MAIN" /> <category android:name="android.intent.category.LAUNCHER" /> </intent-filter> </activity> </application> <uses-sdk android:minSdkVersion="7" /> <uses-permission android:name="android.permission.WRITE_EXTERNAL_STORAGE" /> </manifest>
?注意:模拟器要建一个SD卡,否则出错。
books.xml内容如下:
<?xml version='1.0' encoding='UTF-8' standalone='yes' ?> <books> <book> <bookname>Android教程0</bookname> <bookauthor>Frankie0</bookauthor> </book> <book> <bookname>Android教程1</bookname> <bookauthor>Frankie1</bookauthor> </book> <book> <bookname>Android教程2</bookname> <bookauthor>Frankie2</bookauthor> </book> </books>?

?