使用Nexus创建私服
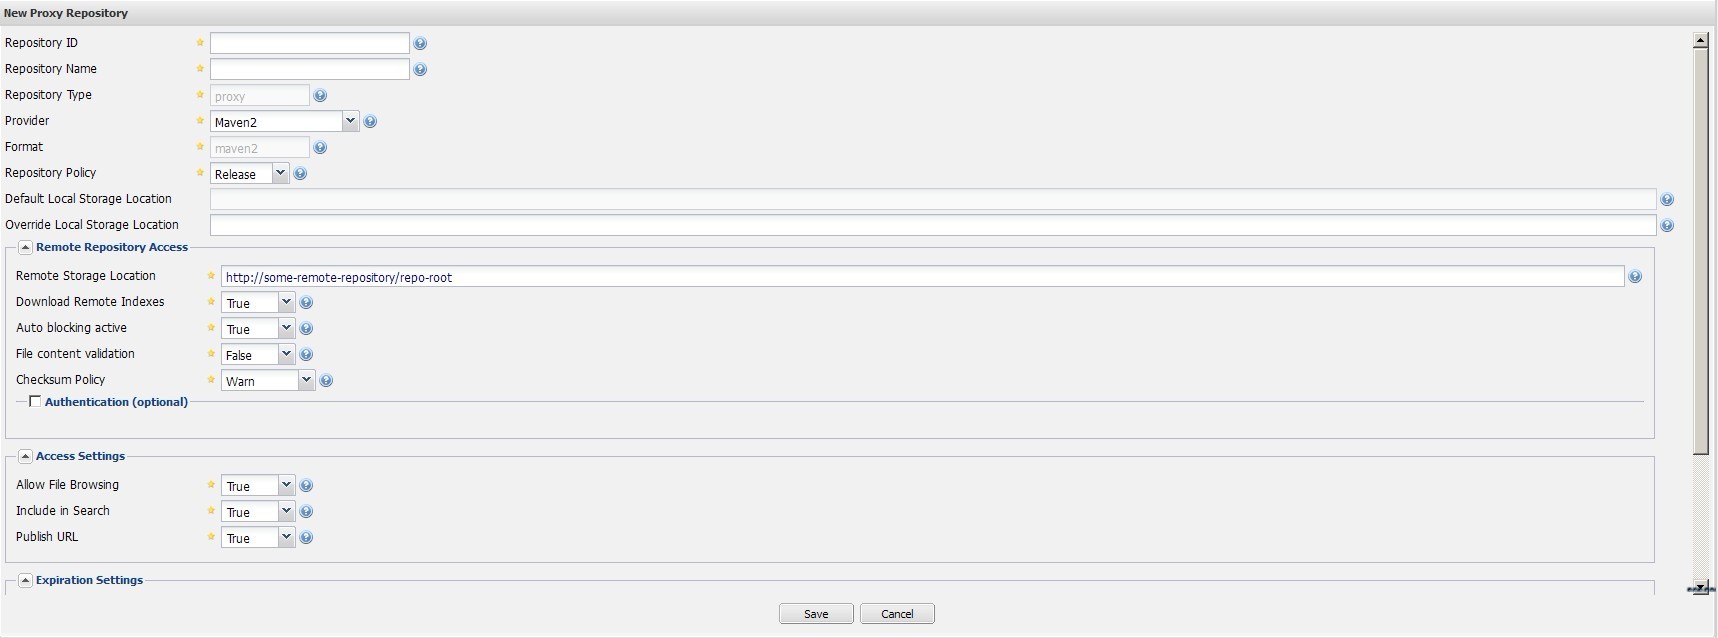
填写仓库ID Repostory ID? 和仓库名称 Repository Name 以及仓库类型Respository Type? 仓库的格式 Provider 选择默认的Maven2 Repository,然后是Repository Policy 读者可以根据自己的需要来配置该仓库是发布版本构件仓库还是快照版本构件仓库。Defualt Local Storage Location 表示该仓库的没哦人存储目录,图中该字段的值为空,待仓库创建好之后,该值就会成为基于sonatype-work的一个文件路径,如:E:\nexus-oss-webapp-1.9.2.3-bundle\sonatype-work\nexus\storage
默认的地址仓库存储目录地址。
Access Setting 小组中
Deployment Policy用来配置该仓库的部署策略,选项有只读(禁止部署)、关闭重新部署(同一构件只能部署一次)以及允许重新部署。
Allow file Browsing 表示是否允许浏览仓库内容
Include in Search 表示是否对该仓库进行索引并提供搜索
Publish URL 用来控制是否通过URL提供服务,如果选择false当访问仓库的地址时,会得到HTTP404 Not Found 错误
Not Found Cache TTL 表示当一个文件没有找到后,缓存这一不存在的信息的时间。以默认值1440分钟为例,如果某文件不存在,那么在之后的1440分钟内,如果Nexus再次得到该文件的请求,它将直接返回不存在的信息,而不会查找位呢间系统。
?
创建Nexus代理仓库
?
操作和创建宿主仓库类似,主要Repository Type 的值改为proxy 这时看到如下图:

对于代理仓库来说,最重要的是远程仓库地址即
Remote Storage Location,用户必须输入有效的值
Download Remote Indexes 表示是否下载远程仓库的索引
Checksum Policy 配置校验出错时的策略,用户可以选择忽略、记录警告信息或者拒绝下载。
Authentication 当远程仓库需要认证的时候这里的时候,这里的Authentication 配置就能派上用处。
Artifact Max Age 构件缓存最长的时间,对于快照版本来说 Artifact Max Age 默认值为 -1,表示构件混存后就一直保存着,不在重新下载,对于快照版来说默认值为1440分钟表示每隔
Metadata Max Age 仓库元数据文件缓存的最长时间
Http Request Setting 和 Override HTTP proxy Setting 其中前者用来配置Nexus访问远程仓库时HTTP请求参数,后者用来配置HTTP代理
创建Nexus仓库组???
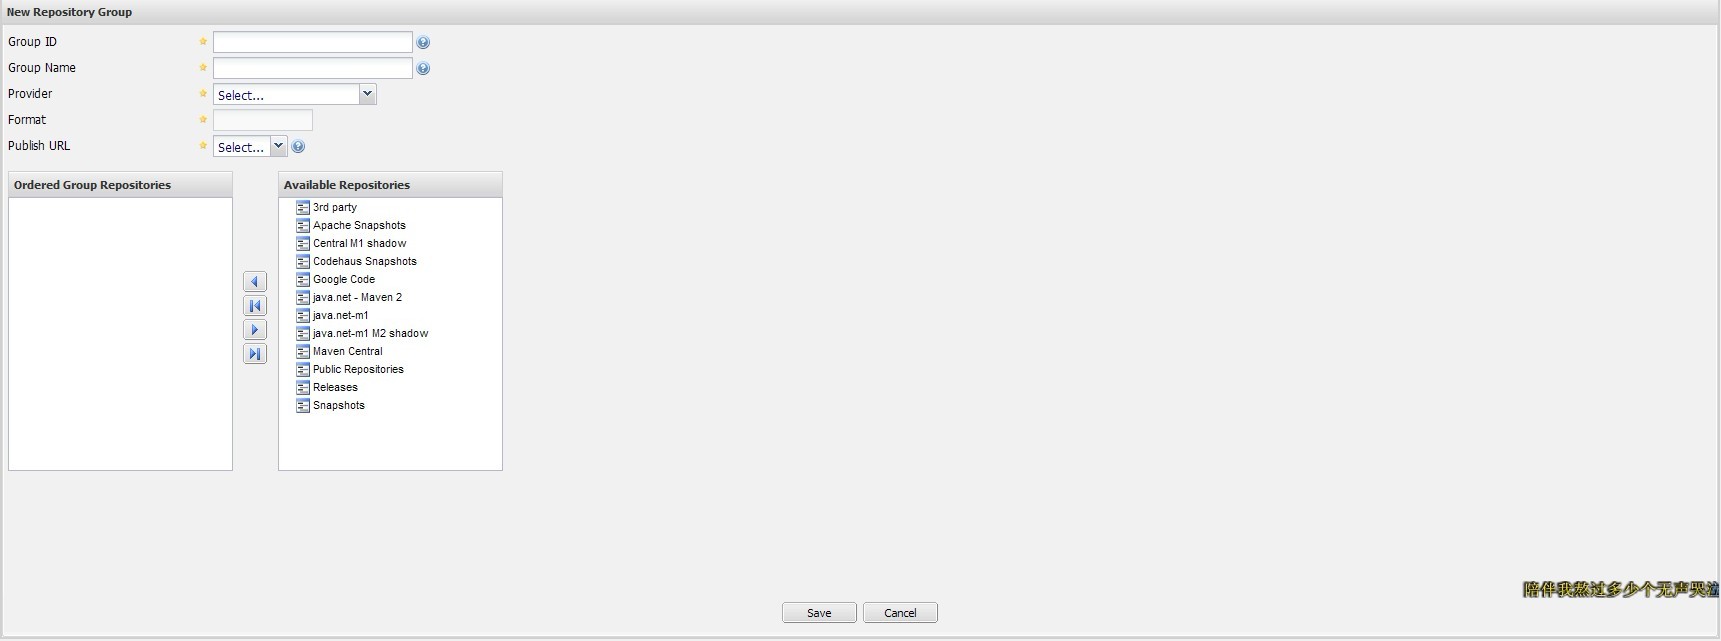
创建仓库组同其他的一样步骤是在选择add时选择下拉框中的Repository Group 就会看到如下的:

配置中的信息同其他的一样,仓库组中没有Release 和Snapshot ,这不同于宿主仓库和代理仓库。在配置界面中可以选择Nexus中的仓库,将其聚合成一个虚拟的仓库组,注意,仓库组所包含的仓库的顺序决定了仓库组便利其所含仓库的次序,因此最好将常用的仓库放在前面,当用户从仓库组下载构件的时候,就能经快的访问到包含构件的仓库。
Nexus的索引与构件搜索
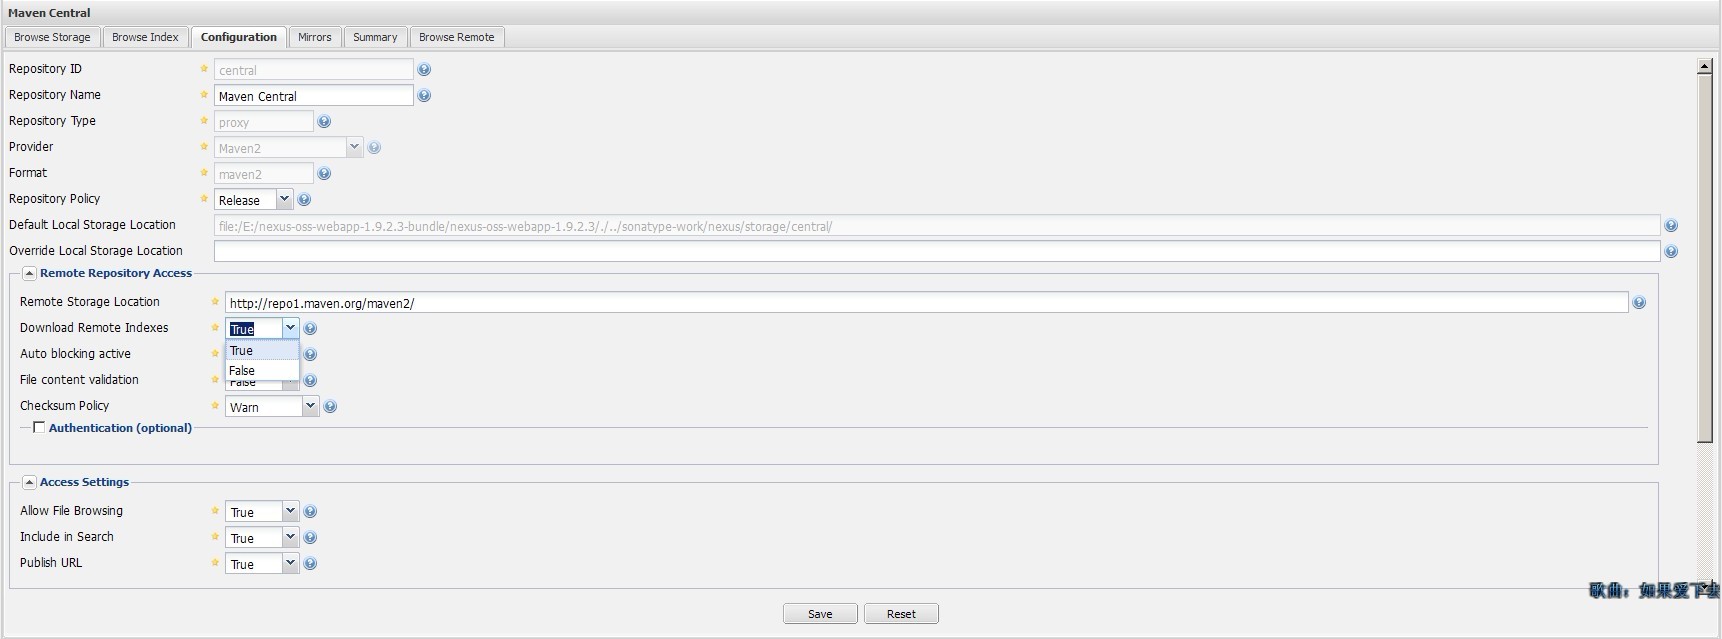
需要搜索Maven 中央库,首先需要设置Nexus中的Maven Central 代理仓库下载远程索引 如下图:

Download Remote Indexes 属性设置为true 默认为false
true是开启,false是关闭 由于中央仓库内容比较多,因此其索引文件比较大,需要查看下载如何了,我们可以单击界面左边导航栏中的 Scheduled Tasks 链接后,就可以看到系统调度的任务其状态为 runing,在说哦因下载完毕之后,该任务就会消失。
Scheduled Tasks 界面:

配置Maven 从Nexus下载构件
当需要为项目添加Nexus私服上的public仓库时,可以在项目pom.xml文件配置? 代码如下:
<project> <repositories> <repository> <id>nexus</id> <url>http://http://localhost:4040/nexus/content/groups/public/</url> <releases><enabled>true</enabled></releases> <snapshots><enabled>true</enabled></snapshots> </repository> </repositories> <pluginRepositories> <pluginRepository> <id>nexus</id> <url>http://localhost:4040/nexus/content/groups/public/</url> <releases><enabled>true</enabled></releases> <snapshots><enabled>true</enabled></snapshots> </pluginRepository> </pluginRepositories> </profile> </project>
这样的配置只对当前的Maven项目有效,实际应用中,我们往往想要通过一次配置就完成能让本机所有的Maven项目都使用自己的Maven私服。这时配置本地仓库setting.xml 代码如下:
<settings> <mirrors> <mirror> <id>central</id> <mirrorOf>*</mirrorOf> <url>http://localhost:4040/content/groups/public/</url> </mirror> </mirrors> <profiles> <profile> <id>JDK1.6</id> <activation> <activeByDefault>true</activeByDefault> <jdk>1.6</jdk> </activation> <properties> <maven.compiler.source>1.6</maven.compiler.source> <maven.compiler.target>1.6</maven.compiler.target> <maven.compiler.compilerVersion>1.6</maven.compiler.compilerVersion> </properties> </profile> <profile> <id>central</id> <repositories> <repository> <id>central</id> <url>http://central</url> <releases><enabled>true</enabled></releases> <snapshots><enabled>true</enabled></snapshots> </repository> </repositories> <pluginRepositories> <pluginRepository> <id>central</id> <url>http://central</url> <releases><enabled>true</enabled></releases> <snapshots><enabled>true</enabled></snapshots> </pluginRepository> </pluginRepositories> </profile> </profiles> <activeProfiles> <activeProfile>central</activeProfile> <activeProfile>JDK1.6</activeProfile> </activeProfiles></settings>
使用Maven 部署构件至Nexus
日常开发生成的快照版本构件可以直接部署到Nexus中策略为Snapshot的宿主仓库中,项目正式发布的构件则应该部署到Nexus中策略为Release的宿主仓库中。POM.XML配置如下:
<project> <distributionManagement> <repository> <id>nexus-releases</id> <name>Nexus Releases Repository</name> <url>http://localhost:4040/nexus/content/repositories/releases</url> </repository> <snapshotRepository> <id>nexus-snapshots</id> <name>Nexus Snapshots Repository</name> <url>http://localhost:4040/nexus/content/repositories/snapshots</url> </snapshotRepository> </distributionManagement></project>
Nexus 的仓库对于黎明用户是只读的为了能够部署构件,还需要在setting.xml 中配置认证信息代码如下:
<servers>       <server>      <id>releases</id>      <username>admin</username>      <password>iapppay</password>    </server>    <server>      <id>snapshots</id>      <username>admin</username>      <password>iapppay</password>    </server>
</servers>